HD Instance Valentine Tutorial


On Valentine's Day, I wanted to create a personalized valentine card for my beautiful chinese wife. The character you see above is chinese for "love". That seemed appropriate enough. I wanted to make something nice, and make it myself. Why not use HD Instance? Nothin' says lovin' like rendering a valentine with software you wrote yourself :)


Part 1 - The Backdrop


Balloons came to mind. I roughed out a heart shape using quads, and extruded it to get the right puffiness.


Converting the polys to subpatches allowed me to tweak the shape until it was cutesy enough.


I subdivided with "metaform" mode once to allow me to tweak the shape at a higher resolution. I selected the points around the edges, and I scaled them down a bit on the Z axis to give the balloon a rounder shape. I'm going to leave this as subpatches for rendering.


Next I texture mapped the love character onto the balloon. I actually used it as an alpha mask to map a golden character onto a red background. You can see my two gradient layers under the image layer. These are red on the bottom and gold on top. Inside modeler, I used the Texture display mode so I could get real-time feedback from the image map position and size. Piece of cake.


In a new object, I sprayed some points which I'll use to place the balloons using HD Instance. I also merged points with an absolute distance a little larger than my balloon, to make sure the balloons don't run into each other.


I loaded up the two objects and set both of them to dissolve 100%. I don't want the original objects to render; I just want the instances. Next I slapped HD Instance onto the points object, and set it to clone the heart balloon object with a little bit of random rotation variation. Using the bounding box preview as a guide, I moved the points object around until the balloons seemed to be arranged nicely on the screen. Then I threw in the HD Instance volumetric and hit render.


After some test renders and surface tweaking, I threw in a cloud image in the backdrop, which I had previously adjusted in Photoshop to agree more with the balloons. That's my backdrop!


Part 2 - The Foreground


The idea for the foreground was to have a mass of smaller balloons spelling out "love". This is easiest to do with weight maps, so the first thing to do is put the image in the backgound in Modeler and set the view mode to Wireframe so I can trace over it. Then I created a box with enough subdivisions to resolve the details in the character, but not too many subdivisions because I don't want the balloons to be too small.


Next I carefully selected points that I thought would best represent the character. I deviated a little from the original in places where I didn't have enough resolution.


Here's the neat part. Switching the view mode to Weight Shade mode, I created a new weightmap called "love", and cleared it. Then I used the Set Map Value tool to set the value at my selected points to 100%.


A sudden spark of inspiration had me create a second weightmap called "heart", and I drew weights in the shape of a heart. I decided that the heart would contain red balloons, and the character would be written using gold balloons. So I went back to my heart balloon object, and saved a new object with a red heart on layer 1 and a gold heart on layer 2. I could have used separate object files, but putting them on separate layers works too.


Okay, back in layout. I loaded up my red and gold balloons, and my box object with my weightmaps. Again I set all the dissolves to 100% to hide the originals from the render. I applied HD Instance to the box object, and set the emitter type to Points. I first set up the red balloon layer. I used some random rotation variation again, and this time some scale variation as well. I set the density weightmap to the "heart" map, so that only the points inside the heart shaped area would generate instances. The preview bounding boxes look about right.


Next I added another object to clone using the "Add Object" button. For my convenience, this copies the first object settings. 
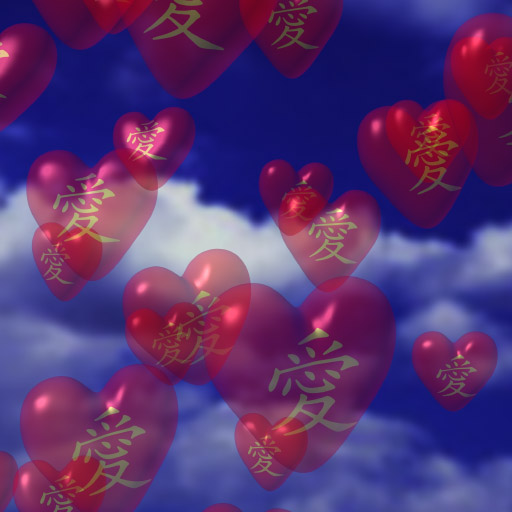
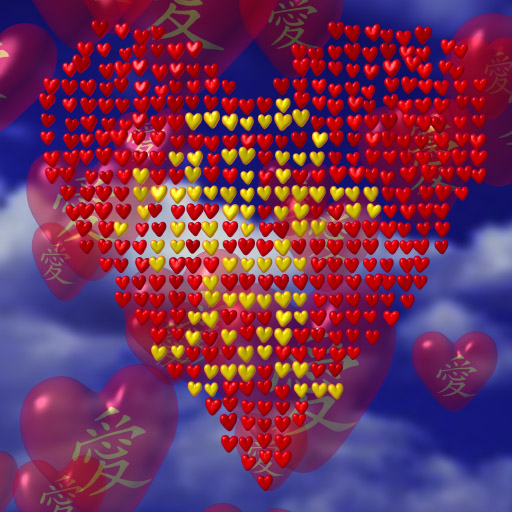
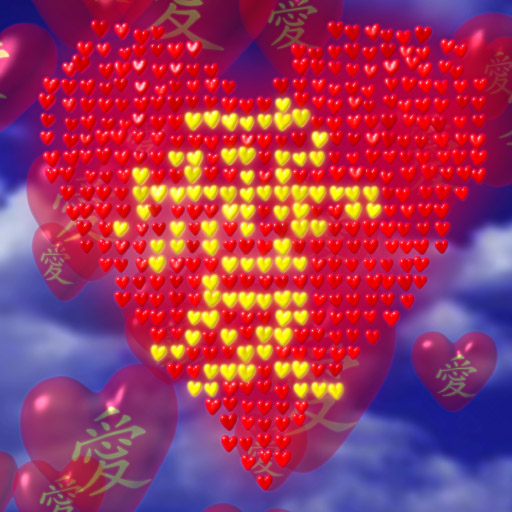
I changed the object to clone to the gold balloon, and I changed the weightmap to the "love" map. Now, here's a trick for layering instances: 
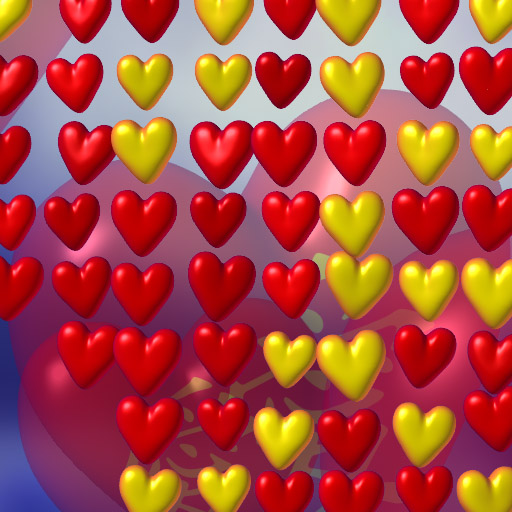
if I just left things like that, then the points that had both heart and love maps at 100% would mix the red and gold balloons at a 1 to 1 ratio. That happens because both layers are set to density 100%. In order to basically guarantee that the gold balloons would override the red balloons, I set the gold balloons' layer density to 1000000%. This will give me a 1000000 to 100 ratio of gold to red balloons on those points, or 10000 to 1, which is good enough for this object. Finally, I noticed that my "love" weightmap extended out a little bit past my "heart" weightmap near the bottom of the character. This was easily fixed by applying the "heart" weight map in the size options. I could have gone back in and changed my weightmaps, but this was just a few clicks.


Okay, I still wanted more variation, so I applied a textured displacement map to the box object. I used a simple noise texture, which showed up nicely in the preview.


I added the backdrop from part 1 in the compositing panel. After a few test renders to tweak my surface gradients, I got a nice image.


Just to give you an idea of the resolution of my actual render, here is a detail close-up of some of the balloons. I rendered at 2000 by 2000 pixels, which got me about 300 DPI in print. HD Instance isn't at all intimidated by high resolutions. It laughs in the face of print res.


For final touches, I added a dreamy effect in Photoshop, with a little help from the foreground alpha channel. I also tossed in a dash of Unsharp Mask so it would show up better in print. This is the finished valentine! Best served with wine and chocolate.